HomeUser Guide › Dashboard
The dashboard

Everything at a glance, built the way you want it

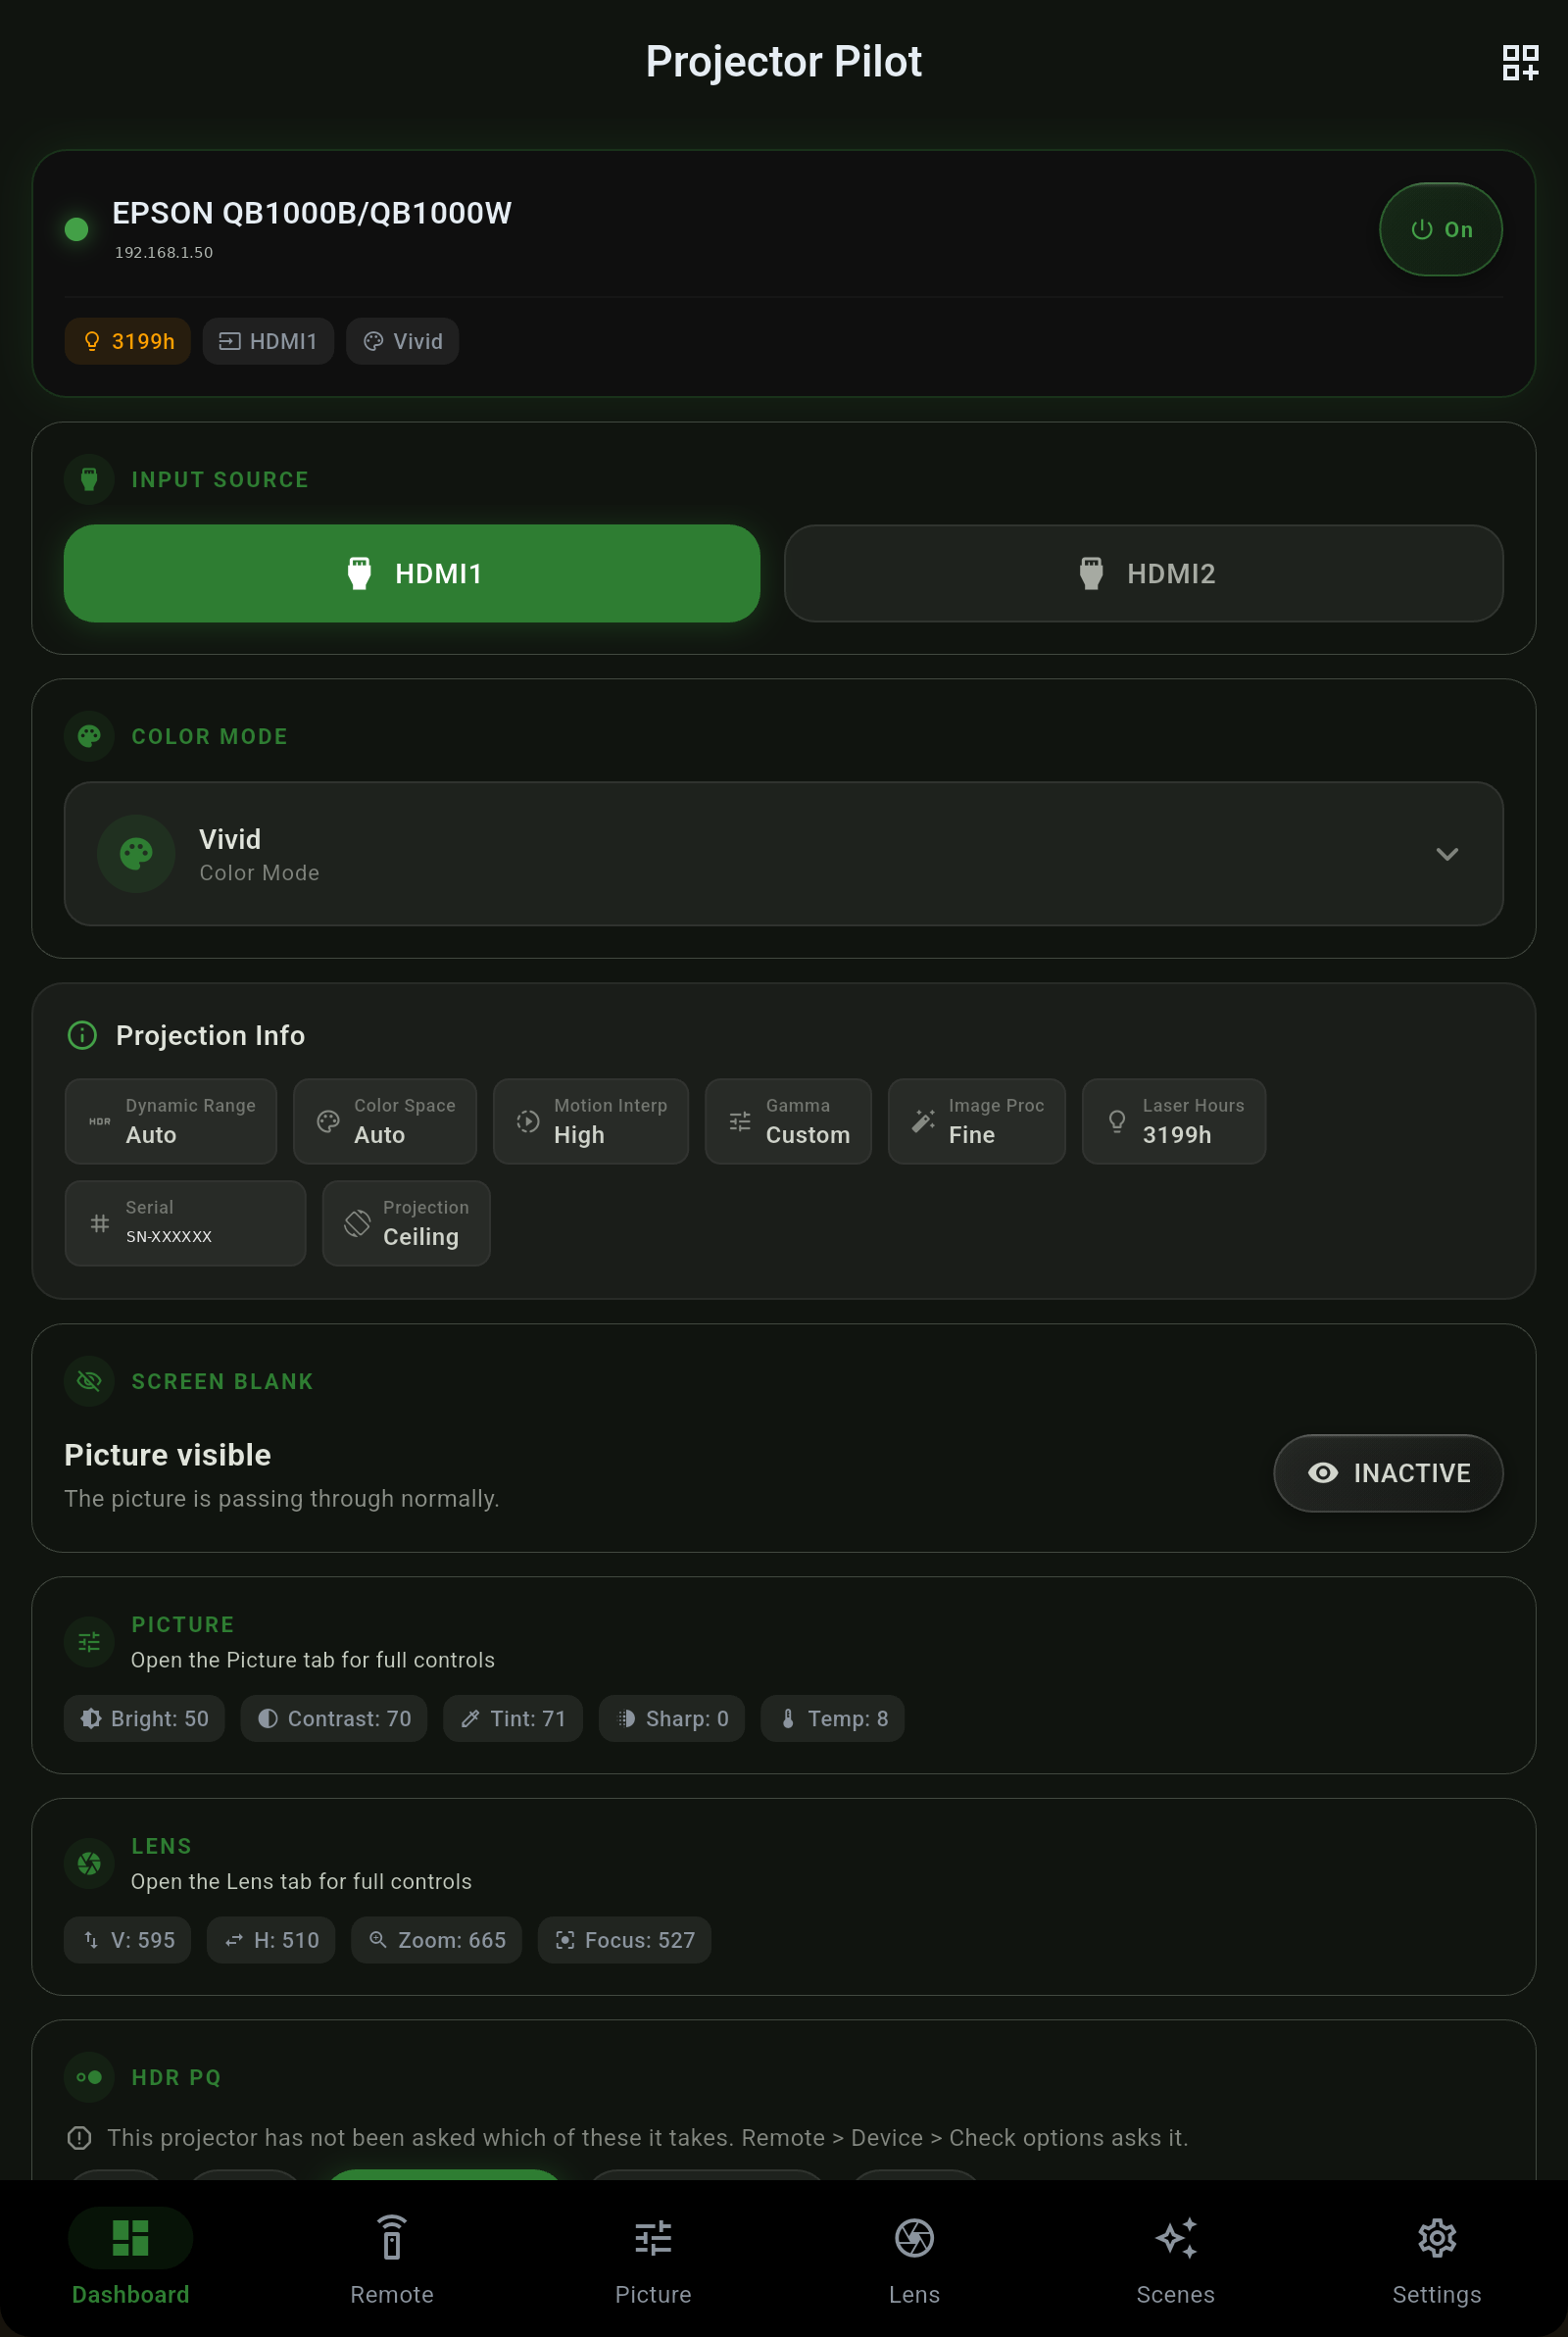
The dashboard is your home base. Live status across the top, a card for every part of the projector below it, and a Customize mode that lets you add, hide and reorder those cards so the screen shows what matters to you. Every figure is read from the projector and refreshed as it changes.
Live status

Power, input and color mode, up top

  • Power pill. One tap powers the projector on or off, and the pill is warm-up and cool-down aware - it shows the projector working through its warm-up or cool-down rather than pretending the state flipped instantly.
  • Input source. The current source at a glance, tappable to switch.
  • Color mode. The active picture mode (Dynamic, Cinema, Natural and so on), read from the projector.
  • Screen blank. Blank the picture without cutting the signal, and the dashboard agrees with the Remote - blanked reads as active in both places.
Projector Pilot dashboard showing live power, input, color mode and projection info cards
Projection info

What the projector is actually doing

The projection info card reads the real signal and installation details straight from the chassis - nothing here is inferred.

FieldWhat it shows
Dynamic rangeSDR or HDR, kept separate from color space so a signal is never mislabelled.
Color spaceThe incoming gamut, for example BT.2020 or BT.709 - reported on its own, not folded into an HDR badge.
GammaThe active gamma the projector reports.
Laser hoursLight-source hours run, so you can track the panel or laser life. Lamp models show lamp hours instead.
Serial numberThe projector's own serial, read from the chassis.
MountCeiling or rear projection, as the projector has it set.
Color space and dynamic range are separate fields, on purpose. A BT.2020 SDR signal - common when an external tone-mapper like MadVR is doing the work - reads as exactly that, never as a false HDR10 badge.
Summary cards

Picture and lens, at a glance

Make it yours

Add, hide and reorder the cards

Tap Customize and the dashboard becomes editable. Add a card from the picker, drag to reorder, or hide any card you never look at.
  1. Tap Customize on the dashboard.
  2. Add a card from the picker - Power, Input, Color Mode, Screen Blank, Picture, Lens, Signal and Eco/Operation are all available, and there are more card types in the fuller picker.
  3. Drag to reorder so your most-used controls sit at the top.
  4. Hide anything you do not need. Done - the layout is yours and it sticks.
Only cards for controls your projector actually supports are offered. If your model has no motorized lens, there is no lens card to add - the app never shows a control the hardware cannot answer.
Next

Keep going