Home › User Guide › Lens
Lens

Lens and installation

Frame the picture from your seat. The Lens tab has two pages, Lens and Installation, and shows only the movements and settings your model documents. Lens control is part of Pro.
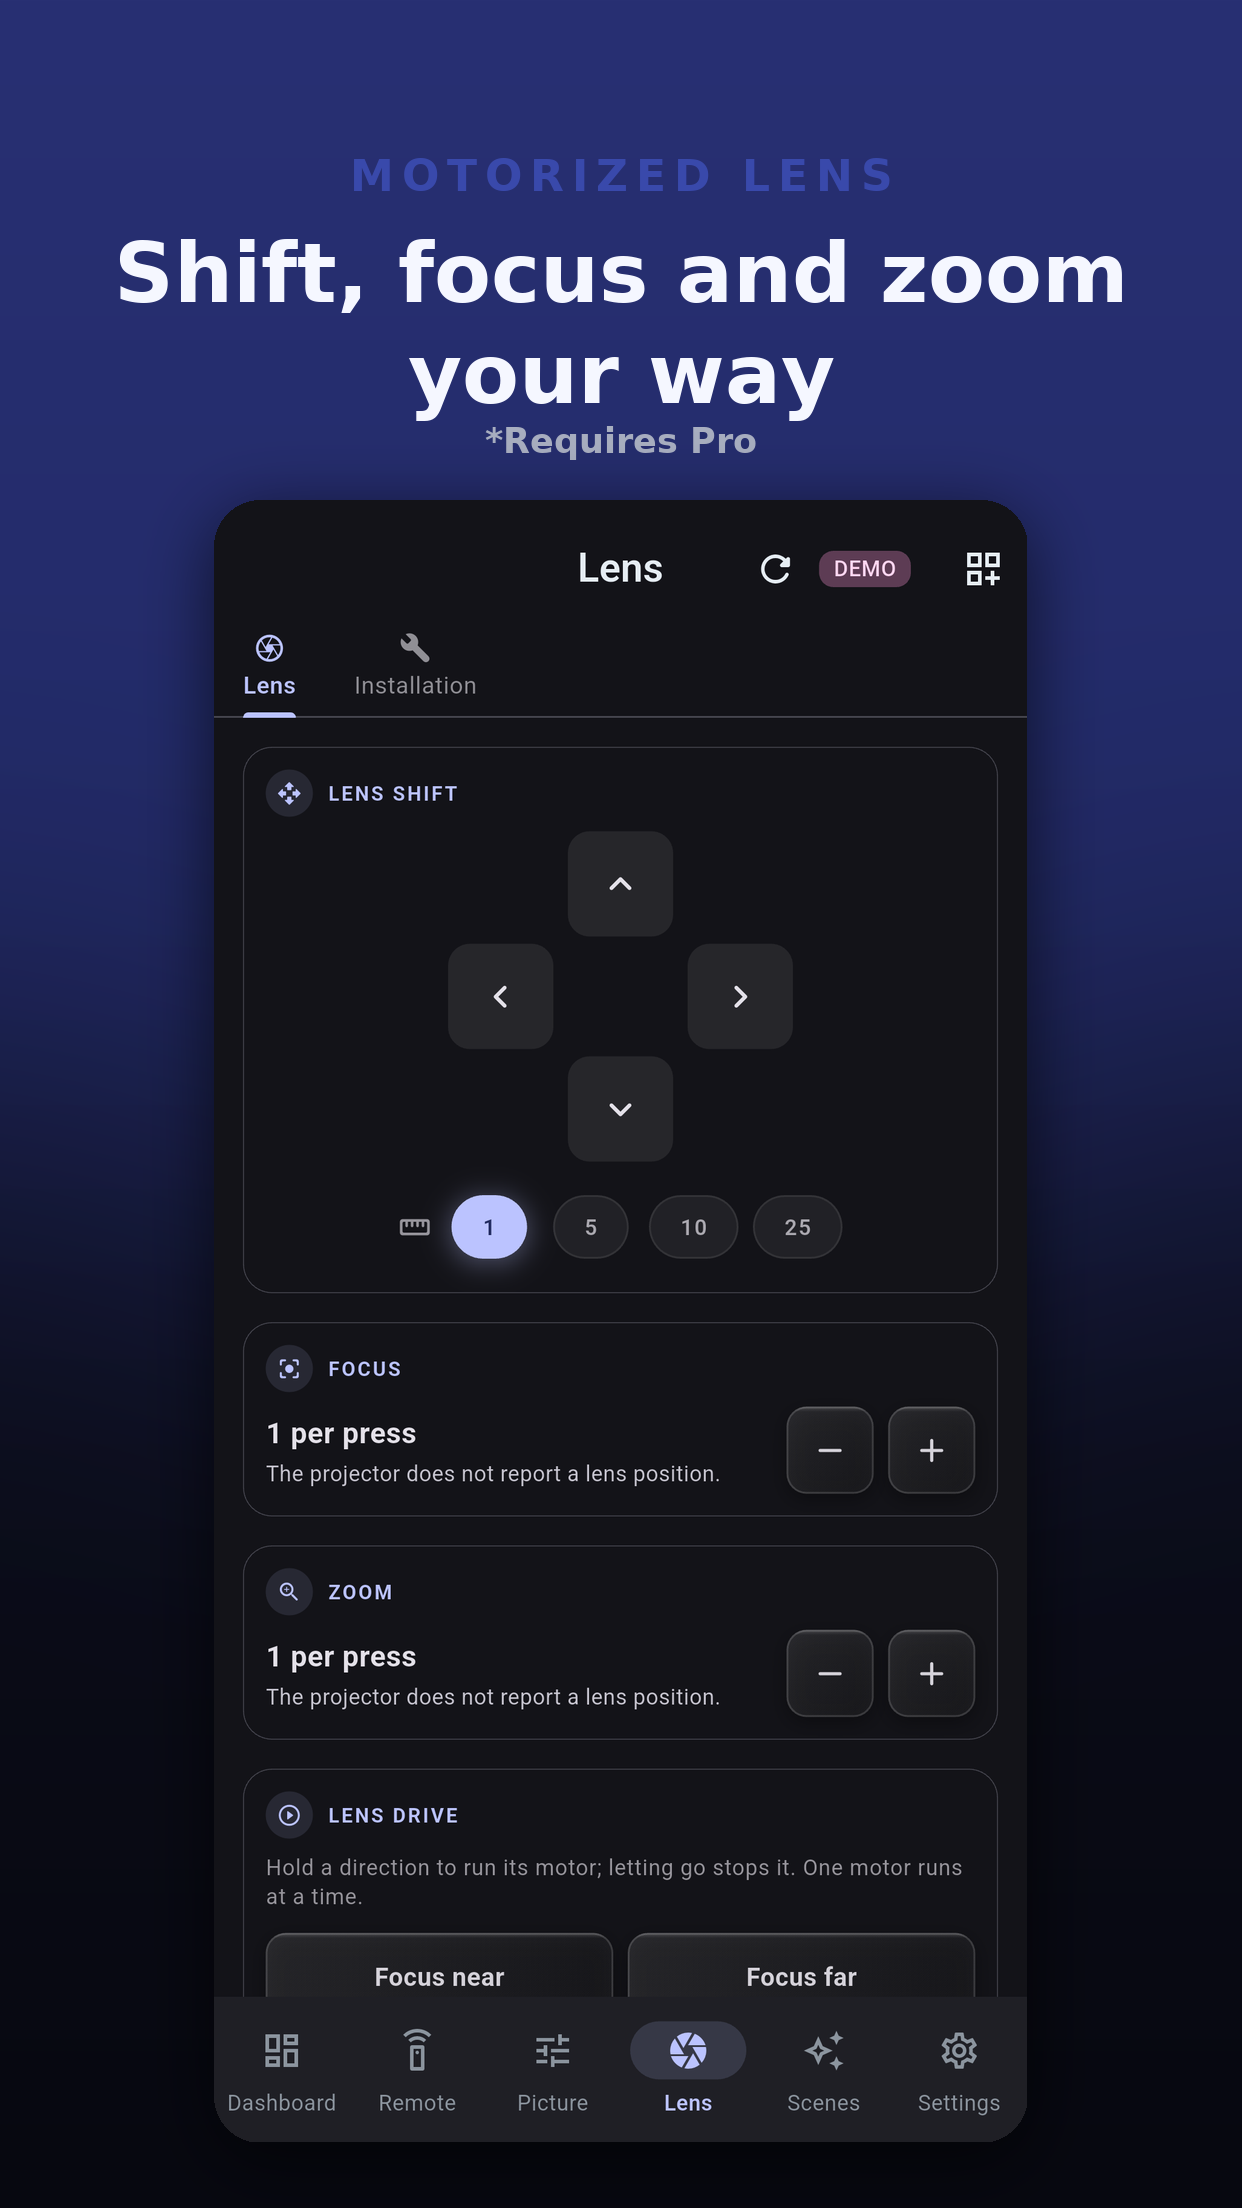
Lens page

Shift, focus and zoom

  • Lens Shift. A pad with shift up, down, left and right. Choose how far each press moves: 1, 5, 10 or 25 steps.
  • Focus. Focus near and Focus far.
  • Zoom. Zoom wide and Zoom tele.
  • Each card appears only if your model's command table lists that movement.
Projector Pilot D-ILA lens page with lens shift pad, focus and zoom buttons
Lens Drive

Hold to drive the motor

On models that support it, the Lens Drive card runs a lens motor for as long as you hold a direction. Letting go stops it, and only one motor runs at a time. A Stop button is there too.

If the stop could not be sent, the app says so: the lens may have run to the end of its travel in that direction. Nothing is hidden.
Where is the lens?

No position readout

JVC projectors do not report a lens position, so the app does not show one or guess at it. Watch the screen while you move the lens, and save a position you like to a lens memory.

Lens Memory

Recall and save positions

Lens memories store the lens position on the projector itself. The app shows one Memory chip for each slot your model has.

  1. Recall: tap a Memory chip. The projector moves the lens to that position.
  2. Save: tap Save Current Position and pick a slot in Save to Slot. If the slot already has a name, the dialog shows which one it replaces.
  3. Confirm: Save Lens Memory asks once more, because saving replaces whatever is stored in that slot.
Save Current Position appears only on models that support saving a lens memory over the network. Recall and save are part of Pro.
Installation page

How the projector is set up

Only the settings your model documents appear. Mask and picture position are on the Display page of Picture; the installation mode and anamorphic remote keys are in More controls on the Remote tab.
One-tap framing

Lens memory in scenes and Home Assistant

Step by step

A framing routine

  1. Put up the projector's test pattern from Settings, Tools, Test Pattern, on models that offer one over the network.
  2. Use the Lens Shift pad with a large step to get close, then switch to 1 step for the last few presses.
  3. Set Zoom and Focus with their buttons, or hold a direction on the Lens Drive card on models that have it.
  4. Save the result to a lens memory slot, so you never have to do it again.
  5. Turn the test pattern off, and add the Lens Memory card to the dashboard if you switch framings often.
Questions

Lens questions

Why is there no Lens Drive card?

Lens Drive appears only on models whose command table lists it. Without it, the Shift, Focus and Zoom buttons still move the lens step by step, on models that support them.

Where are lens memories kept?

On the projector itself. The app reads which slots your model has and recalls or saves them there, so a memory saved in the app is the same one the projector holds.

Is lens control free?

No. Lens shift, focus, zoom, Lens Drive and lens memories are part of Pro. See Pricing.
Next

Keep going